


Looking to record your lesson so your students can view it at home? The SMART Recorder offers an easy way to do this and is included as part of the FREE SMART Notebook basic download. SMART Recorder lets you record the full screen or a portion of the screen and if you connect a microphone to your computer you can record your voice as well. The recorded lessons can then easily be shared with your students. Here’s how:
How to use the SMART Recorder to record your lesson:
- Tap the SMART Board icon in the notification area (Windows operating systems) or Mac menu bar (macOS operating system software), and then select Recorder.
 Windows Mac
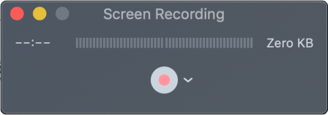
- To record the entire screen, tap Record ( or ). To record a screen area, tap the down arrow next to the Recordbutton in SMART Recorder, select Record Area, and then draw a rectangle around the area you want to record.
For Windows operating systems: To record a window, tap the down arrow next to the Record button in SMART Recorder, select Record Window, and then select the window you want to record.
- Perform the on-screen actions you want to record. If you connected a microphone to your computer, speak into your microphone and your voice will also be recorded.
- If you want to pause your recording, tap Pause. To resume recording, tap Record.
- After you complete the actions you want to record, tap Stop in SMART Recorder.
- To save, type a file name and tap Save in the dialog box that appears (Windows) or the QuickTime Player menu (Mac)
In Windows operating systems, you can create the recording as a SMART Recorder video file, a Windows Media video file or self-extracting file.
In macOS operating system software, you can create the recording as a video file that you can view using QuickTime software.
Here is a quick video tutorial:
Click here for more information on how to use the SMART Recorder.
What would you like to learn about as part of our 'Did You Know' series? Drop a comment to let us know!


